presto pressure canner instruction manual
Presto Pressure Canner Instruction Manual⁚ A Comprehensive Guide

This comprehensive guide provides detailed instructions and essential information for using your Presto Pressure Canner safely and effectively. Whether you’re a seasoned canning enthusiast or a beginner, this manual will equip you with the knowledge and confidence to preserve your favorite foods for months to come.
Introduction
Welcome to the world of home pressure canning with Presto! This manual serves as your comprehensive guide to safely and effectively using your Presto Pressure Canner. Pressure canning is a reliable and time-tested method for preserving low-acid foods like vegetables, meats, poultry, fish, and seafood. It involves using a sealed pressure canner to create a high-temperature environment that eliminates harmful bacteria and ensures long-term food safety. Presto Pressure Canners are renowned for their durability, ease of use, and commitment to food safety standards.
Within this manual, you will find detailed instructions on everything from preparing your canner and processing food to troubleshooting common issues and discovering helpful tips for pressure canning success. Whether you are a seasoned home canner or a beginner venturing into the world of food preservation, this manual will provide you with the knowledge and confidence to create delicious and safe canned goods. Let’s embark on this journey together and explore the rewarding world of pressure canning with Presto!
Pressure Canning⁚ The Safe Method for Low-Acid Foods
Pressure canning is the only safe method recommended for preserving low-acid foods, including vegetables, meats, poultry, fish, and seafood. These foods are susceptible to botulism, a serious and potentially fatal foodborne illness caused by the bacterium Clostridium botulinum. Botulism spores can survive in low-acid environments, and they produce a toxin that can cause paralysis if ingested.
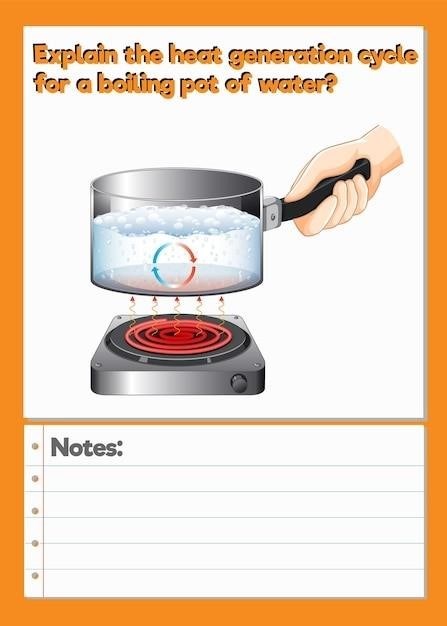
Pressure canning utilizes the power of steam to create high temperatures within the canner, reaching temperatures significantly higher than boiling water. This intense heat effectively eliminates botulism spores and other harmful bacteria, ensuring the safety of your canned goods. The pressure cooker creates an environment where the boiling point of water is increased, allowing for temperatures exceeding 240°F (115°C) to be reached. This is essential for killing the spores that can cause botulism and other foodborne illnesses.
Following the USDA’s recommended pressure canning guidelines is crucial for ensuring the safety of your canned foods. This manual will provide you with detailed information on proper pressure and processing times for different types of low-acid foods. By adhering to these guidelines, you can confidently enjoy the fruits of your labor, knowing that your canned goods are safe and delicious.
Presto Pressure Canner Models and Features
Presto offers a range of pressure canner models designed to meet the needs of various home canners. Their pressure canners are known for their durability, ease of use, and reliable performance. Some popular models include the Presto 23-Quart Pressure Canner and Cooker, the Presto 01781 Pressure Canner and Cooker, and the Presto Precise Digital Pressure Canner. The 23-quart model boasts a large capacity, perfect for canning larger quantities of food, while the 01781 model is a versatile option for both pressure and boiling water canning. The Presto Precise Digital Pressure Canner features a digital interface for precise temperature and pressure control, simplifying the canning process.
Presto pressure canners incorporate several key features for safe and efficient operation. They feature a weighted gauge for accurate pressure monitoring, a safety release valve to prevent over-pressurization, and a locking mechanism to ensure the canner is securely sealed during processing. Most models also include a rack to elevate jars off the bottom of the canner, promoting even heat distribution and preventing jars from breaking. Many Presto pressure canners are compatible with both gas and electric stovetops, providing flexibility for different cooking environments.
To ensure you are using the correct model for your needs and understand its unique features, consult the specific instruction manual that came with your Presto Pressure Canner. These manuals provide detailed information on the model’s specifications, operating instructions, and safety precautions.
Essential Parts and Accessories
Your Presto Pressure Canner comes equipped with essential parts and accessories that play crucial roles in the canning process. Understanding these components and their functions is vital for safe and successful canning. The primary parts include the canner body, lid, gasket, pressure regulator, and vent pipe. The canner body serves as the main vessel for holding jars and water. The lid seals tightly to create pressure within the canner during processing, and the gasket ensures a leak-proof seal. The pressure regulator controls the pressure within the canner, while the vent pipe allows steam to escape and regulate pressure.
In addition to these core components, you might also find other accessories that enhance your canning experience. These can include a rack to elevate jars above the bottom of the canner, a jar lifter for safely handling hot jars, and a canner funnel for filling jars without spills. The rack promotes even heat distribution and prevents jars from breaking. The jar lifter provides a secure grip for lifting hot jars, and the funnel helps maintain cleanliness and prevent spills during filling.
Ensure that you have all the necessary parts and accessories before you begin canning. Refer to your Presto Pressure Canner instruction manual for a complete list of parts and accessories specific to your model.
Step-by-Step Instructions for Pressure Canning
Pressure canning is a safe and effective method for preserving low-acid foods like vegetables, meats, and poultry. Follow these step-by-step instructions to ensure successful and safe pressure canning with your Presto Pressure Canner⁚
Prepare Your Canner⁚ Thoroughly clean and sanitize your Presto Pressure Canner, lid, and accessories. Ensure the gasket is clean and pliable, and the vent pipe is free of obstructions.
Fill Canner with Water⁚ Add enough water to the canner to reach the appropriate level, usually indicated by a mark on the canner body. The water level should cover the tops of the jars by at least 1-2 inches.
Process Food⁚ Carefully place filled and sealed jars in the canner, ensuring they are not touching each other. Secure the lid tightly, ensuring the vent pipe is open.
Bring Canner to Pressure⁚ Heat the canner over medium-high heat until steam vents consistently from the vent pipe. Once steam vents steadily, adjust the pressure regulator to the desired pressure, as indicated in your recipe or the USDA guidelines.
Process Time⁚ Maintain the desired pressure for the recommended processing time, as specified in your recipe or the USDA guidelines. It’s crucial to follow the precise processing time for each type of food to ensure proper safety and preservation.
Natural Cooling⁚ Once the processing time is complete, turn off the heat source and allow the pressure to naturally reduce to zero. Do not attempt to force the pressure out.
Preparing Your Canner
Preparing your Presto Pressure Canner is essential for safe and successful canning. Here are the steps to ensure your canner is ready for use⁚
Clean and Sanitize⁚ Thoroughly wash the canner, lid, rack, and any other accessories with hot soapy water. Rinse them well and then sanitize them by immersing them in boiling water for 10 minutes. Allow them to air dry completely.
Inspect the Gasket⁚ Ensure the gasket is clean, pliable, and free from cracks or tears. If the gasket is damaged, replace it with a new one. A worn-out gasket can compromise the seal and lead to inadequate pressure within the canner.
Check the Vent Pipe⁚ The vent pipe is crucial for releasing steam during the heating process. Make sure the vent pipe is clean, unobstructed, and free from any debris. If the vent pipe is blocked, it can affect the pressure within the canner and compromise the safety of your canning process.
Lubricate the Lid⁚ For easier sealing, apply a thin layer of petroleum jelly or canning lubricant to the lip of the lid and the underside of the gasket. This will help create a smoother seal and prevent the lid from sticking to the canner.
Prepare the Canner⁚ Place the rack inside the canner to elevate the jars above the bottom. Fill the canner with water to the appropriate level, usually indicated by a mark on the canner body. The water level should cover the tops of the jars by at least 1-2 inches.
Processing Food
Once your canner is prepared and your jars are filled with food, it’s time to begin the processing. Here are the steps for processing food in your Presto Pressure Canner⁚
Secure the Lid⁚ Place the lid on the canner and fasten it securely. Ensure the vent pipe is open.
Heat the Canner⁚ Place the canner on the stovetop and bring the water to a rolling boil. Allow the steam to vent for 10 minutes to remove any air from the canner. This is crucial for achieving the desired pressure.
Adjust the Pressure⁚ After venting, close the vent pipe. The pressure will begin to build inside the canner; Adjust the pressure regulator to the recommended pressure for the specific food you are canning. The recommended pressure will vary depending on the altitude and the type of food being processed.
Process Time⁚ Once the desired pressure is reached, begin timing the processing time. The processing time will depend on the type of food, the altitude, and the size of the jars. Always follow the specific processing times recommended by the USDA or a reliable canning recipe.
Natural Cooling⁚ After the processing time is complete, remove the canner from the heat source. Allow the pressure to naturally decrease to zero. Do not open the canner until the pressure gauge has reached zero.
Cooling and Storage
After processing, the jars need to cool completely to ensure a proper seal. Here’s how to cool and store your canned goods⁚
Allow Natural Cooling⁚ Once the pressure gauge reaches zero, carefully remove the canner lid, ensuring the vent pipe is open. Place the canner in a draft-free area and allow the jars to cool completely within the canner. This typically takes 12-24 hours.
Check Seals⁚ After the jars have cooled, gently press the center of each lid. If the lid is indented and does not spring back, the jar has sealed properly. If the lid does not indent, the jar did not seal and should be refrigerated and eaten within a few days.
Label and Store⁚ Once the jars have cooled and you have checked the seals, label them with the contents and date. Store your canned goods in a cool, dark, and dry place. Avoid storing them in direct sunlight or in areas with fluctuating temperatures.
Enjoy Your Preserves⁚ Your canned goods should be safe to eat for at least 12 months, and possibly longer, if stored properly. When opening a jar, check for signs of spoilage, such as bulging lids, discoloration, or an off odor.
